OLD TILES WALL TUTORIAL
Tutorial by Philip Klevestav< Back to Material Tutorials Index page
INTRODUCTION
In this tutorial I will go through some sculpting and layout of a pretty simple tile wall.Zbrush, 3DS Max and Photoshop will all be used creating this.
HIGHPOLY
I start with creating two base bricks I will take into Zbrush for some sculpting. Try to keep the faces as square and even sized as possible. With shapes like these rectangles that are twice as long as they are wide it is really easy of course to keep the face distribution totally even.But if you decide to create some more advanced shaped bricks or stones, just keep in mind that the sculpting process will be so much easier the more evenly distributed the faces are on your object.
Do not worry too much about how much you tesselate your object in 3DS Max, it can easily be tesselated more in Zbrush if necessary.
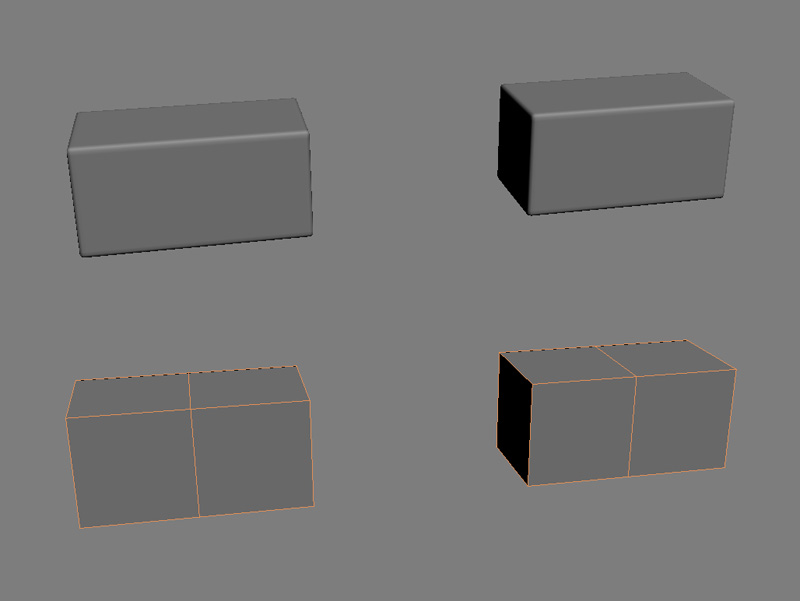
I imported the two stones I made into Zbrush (1) and tesselated them some more (2) until they had a decent amount of polies (In this case something like 330k).

As usual I start with using the "Mallet Fast Brush" and I drag some simple strokes around the edges using a pretty low "Focal Shift" setting on my brush to maintain pretty sharp edges.

Continue this process until you feel done with the edges. Feel free to go a bit more crazy on some of the sides.

I used the "Layer Brush" with the "Spray" setting applied, this way I can quickly scatter out some details on the actual brick sides. If you like to you can do this using the "Projection Master" as well, or use a mix of both. When you feel happy with the result, export your bricks.

Import them into 3DS Max. I optimized them some to be able to handle the polycounts in Max. I also dragged out a plane that will help me keep the stones within the texture boundaries.
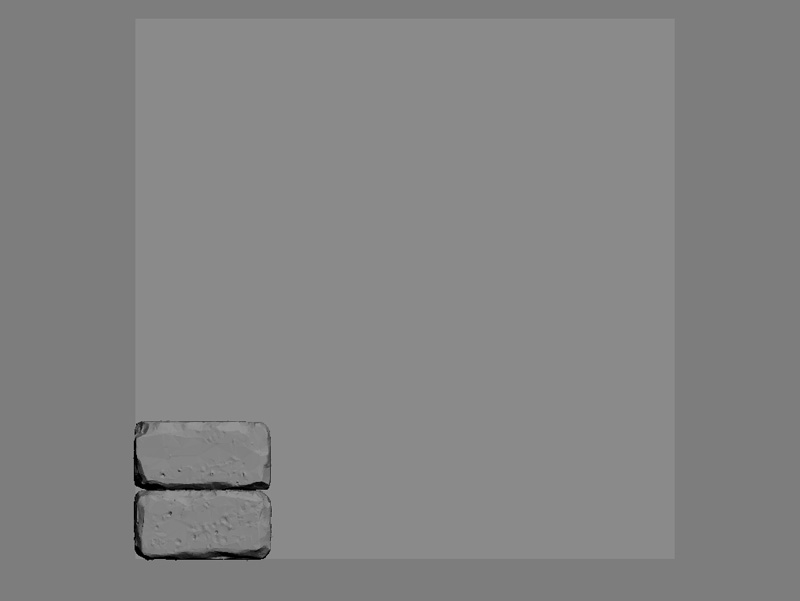
Copy your stones up using "Instance". Then start rotating the stones 90 degrees so that stones nearby each other never have the same side facing the camera. Since we created two stones you have 8 different looking sides in total. Remember you can also flip your instances as you want to make for an even larger variation.

Proceeding with the previous step I now have a whole wall, I offset every other row. Now if you are to bake this to a flat tiling texture you will want to treat the edge stones that will be cut in half by the texture borders horizontally as the same stone. So the red marked edge stones in each row are to be seen as the same stone, for example if you rotate or resize the left side you need to do that on the right as well.
I continue by pushing in and out stones to create a larger depth. I also rotate stones slightly (~5 degrees or less). Of course you do not have to lay out the stones as I did, evenly like this.

And remember if you are working with an engine that has good support for modular meshes you will get a lot nicer result baking this to a lowpoly with some geometry. Here I really quickly put together an arch using the same workflow on the highpoly, just placing out the sculpted pieces and then created a lowpoly with some stones sticking out more.
You can really construct anything with just the same couple of blocks placed various ways. There is an excellent tutorial that goes in a bit more on this by Bram Eulaers, you can find it here.

WORKING ON THE TEXTURE
Since this tutorial is focusing more on the material side and how to create that regardless if it is going to be used as a flat tiling texture in a brush based engine or as a part of a mesh.This is what my bakes looks like when projected to a simple plane. The first thing I do is to offset the bakes in Photoshop and clone away any seams I get if you are to use this as a seamless tiling surface.
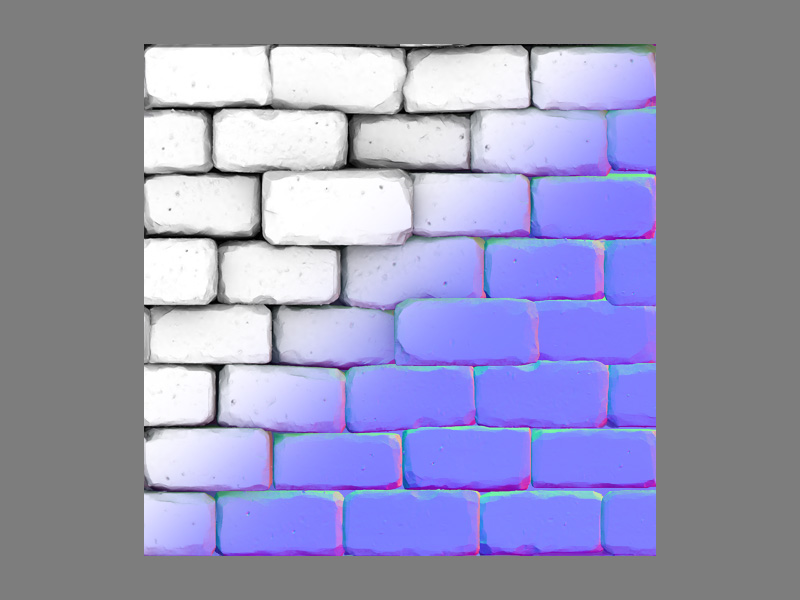
I create a new layer where I fill in some stone edges in the normal map by hand, I also try to paint away any flat surfaces inbetween the stones.
After that I generate some high frequency details from a couple of photos to get some shaper details on my stones.
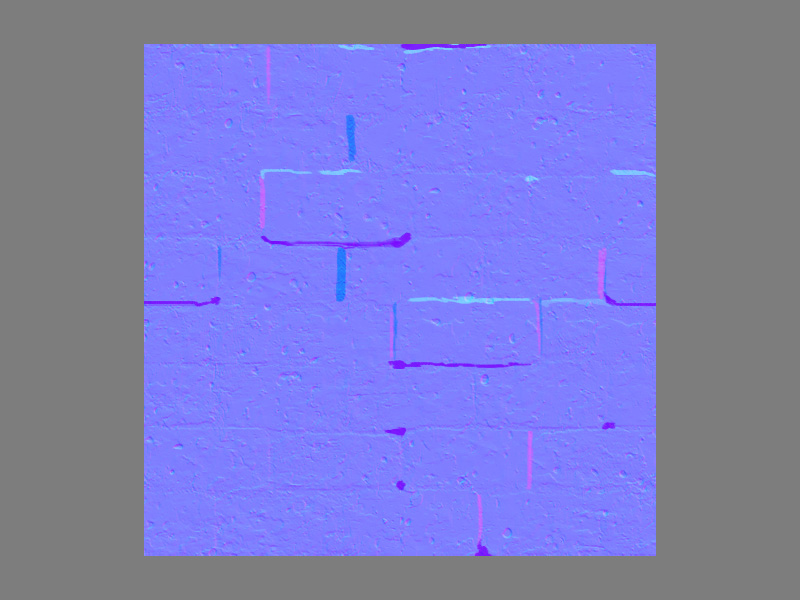
I felt the bakes came out a bit flat if I am to have a more rough looking stone wall, so once again I went into Zbrush, dragged out a plane and used the "Layer Brush" with the "Spray" setting together with the "Projection Master" to quickly create a rough surface.

When baked out to a plane it looks like this. I can now use this as an overlay on my wall and can control the general roughness very easily on them by just altering the opacity on this overlay.

I made the diffuse by having a very simple base layer of some beige color and subtle details, I added another variation layer on to masked with the ambient occlusion map leveled and some other more subtle details. I made the seams more sandy, also masking this layer out with the ambient occlusion map inverted and then some hand painting around a couple of bricks. Finally I added some brightness variation to my stones in a separate overlay layer.

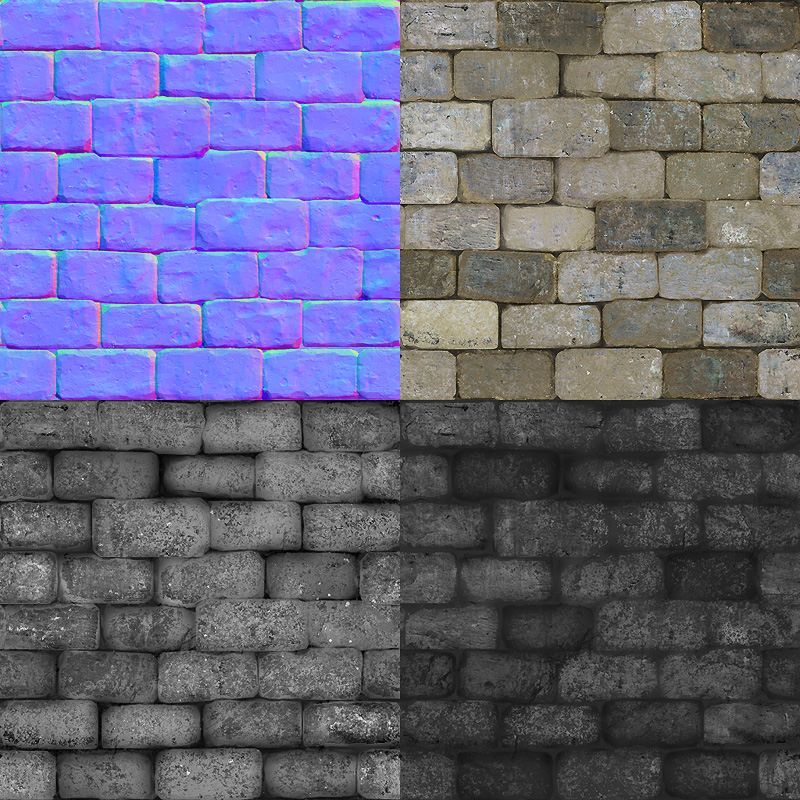
The final maps with the normal map using the overlays seen above. The diffuse is a bit color and contrast adjusted, but you really get most of the diffuse done from just the ambient occlusion bake.
In the specular and glossiness maps I darkened the seams and put an "Outer Glow" using a dark color and setting it to "Multiply" to get some rougher edges. I also kept the specular pretty contrasted.
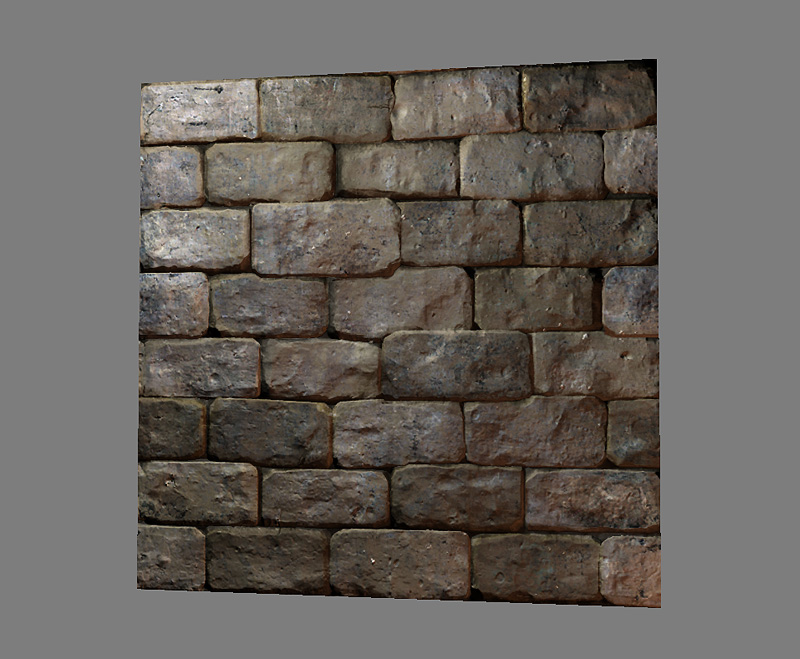
The end result with all maps applied.
Download the .PSD
< Back to Material Tutorials Index page