CRACKED STONE TUTORIAL
Tutorial by Philip Klevestav< Back to Material Tutorials Index page
INTRODUCTION
Damaged and cracked stone can look very different depending on the underlying structure (are there reinforcement metal bars underneath, gravel or perhaps just a more sandlike material?)If the damage was made recently the cracks would be very sharp probably and not smoothed out from weathering.
In this tutorial I created a semi-sharp cracked ground piece. In this tutorial I also used Zbrush to create the normal map base and generate an ambient occlusion map from the highpoly geometry.
HIGHPOLY
First of all it will be a lot easier if you use an alpha texture to get a general shape up quickly.I used a photo based one and added some stuff by hand. In the example below you can see the photo, I inverted it, smart and surface blurred it a bit to get rid of some unecessary small details.
A good thing is to try and have a somewhat smooth gradient when going from black to white. You can easily add this by having the white parts in a separate layer and add a subtle inner glow with black color and set to multiply.
This goes even for sharper edges. If there is no gradient information but only black or white in the alpha the edges will be extremly sharp and you will essentially only have two flat levels of detail in your mesh.

Once you feel you have got an alpha map that should work we move over to Zbrush (you can, and usually will need to, always change the alpha map later on).
In Zbrush add an empty plane and tesselate it.
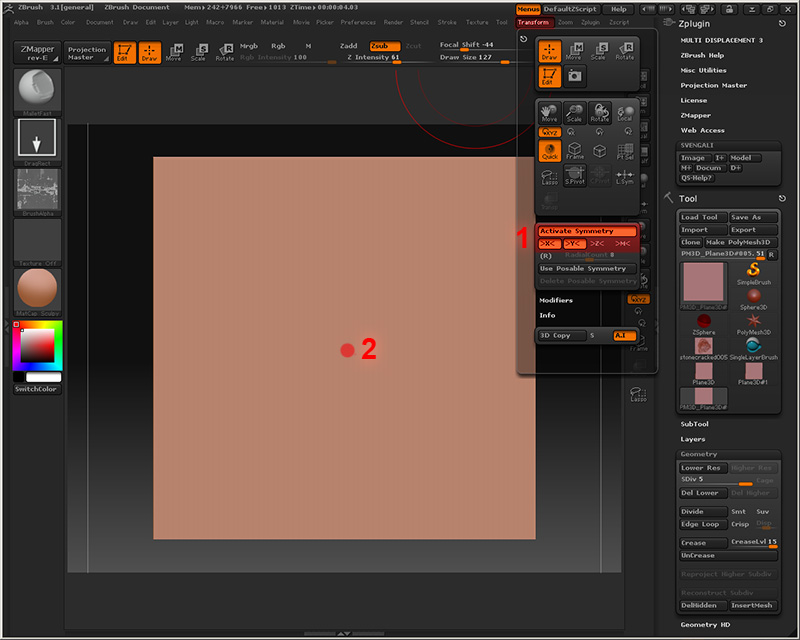
Now, there is probably a better way of doing this for sure, but here is how I did it: You will need to find the middle of the plane because this is the point where our alpha will be projected from. Goto "Transform > Activate Symmetry" and check "X" and "Y" (1).
Now we are in symmetry mode and you can see you can paint symetrical brush strokes both vertically and horizontally. Use the symetrical brush dots to find the middle (where they all meet and become one dot) and add a small bump with the Layer Tool or something else you see fit (2).

Open up the "Brush Alpha" tab and import your saved alpha map you created earlier. Use "DragRect" as the brush stroke setting and I used the "Mallet Fast" brush. Set a fairly low Z Intensity and drag out your alpha starting from the little center bump you painted earlier, be sure to turn Symmetry mode off!
Just drag the alpha all the way to the edge, you can hold shift while dragging to lock the alpha to a 90 degree angle.

Once the alpha is in place you simply start defining the edges better. First of all I used a large Layer Brush and pushed down the whole center part a bit (where the red marked area is), after that I started using the Mallet Fast Brush and worked my way around the crack edges and painted up some more stones.

Do not be afraid to kind of layer up deeper cracks. It may look a bit strange if they are really deep and flat, but if layered a bit it usually work better.
I simply continued to work on all edges, making the cracks larger at the ends where they meet other cracks. Usually stone cracks into some smaller "rocks" or "gravel pieces" where there are intersections between different cracks.

After a couple of more minutes of brushing I went into the Projection Master to add a final pass of detail.

Exported from Zbrush and imported into 3DS Max, extruded the border edges and baked out an ambient occlusion and a normal map.

TEXTURE MAPS
Since I already have a decent base from where I created my alpha map, I added another layer where I masked out everything that was black in the alpha as you can see in the top left part of the image below.
To make the stones in the middle blend in a bit better I added another layer and painted out a mask around the middle stones borders. I then matched this layer to the sorrounding gravel parts to get a smoother transition.
I also added some subtle edge highlights on sharper edges to help bring those out a bit more.

For the specular/gloss I also made a bright dotted layer that I masked out with dark parts by using the ambient occlusion as a mask.
This is to pop out the concrete a bit more from the gravel parts.

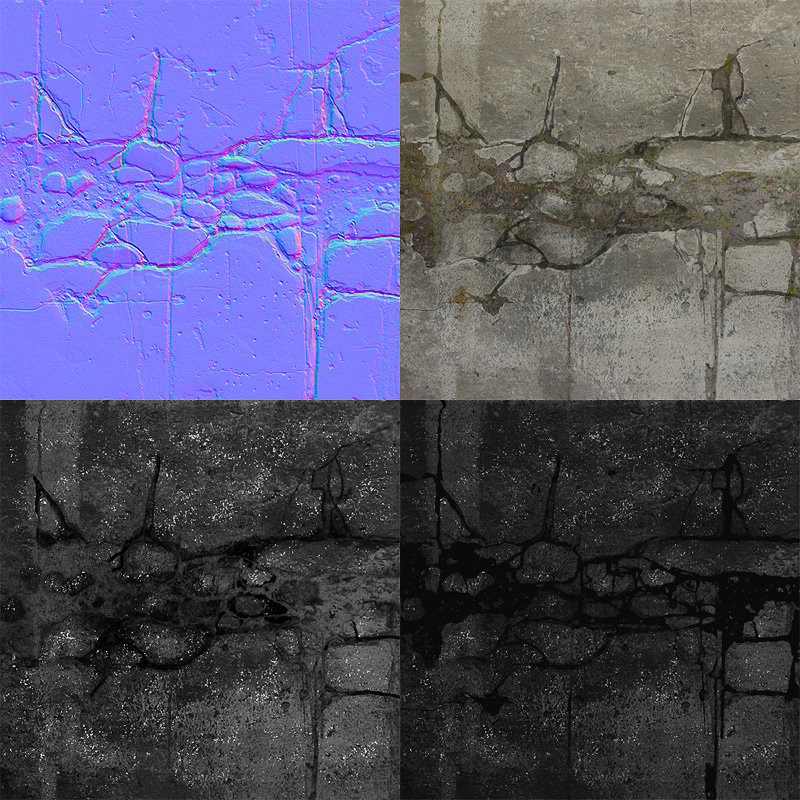
Finally the different maps:
The normal map got an extra overlay from my base in Photoshop.
The diffuse map can be varied easily by adjusting the cracks hue and brightness.
Specular and glossiness maps are pretty straight forward, I decided to make the gravely part have a pretty decent amount of specular intensity while the glossiness in the smae are is very dark (not black tho).

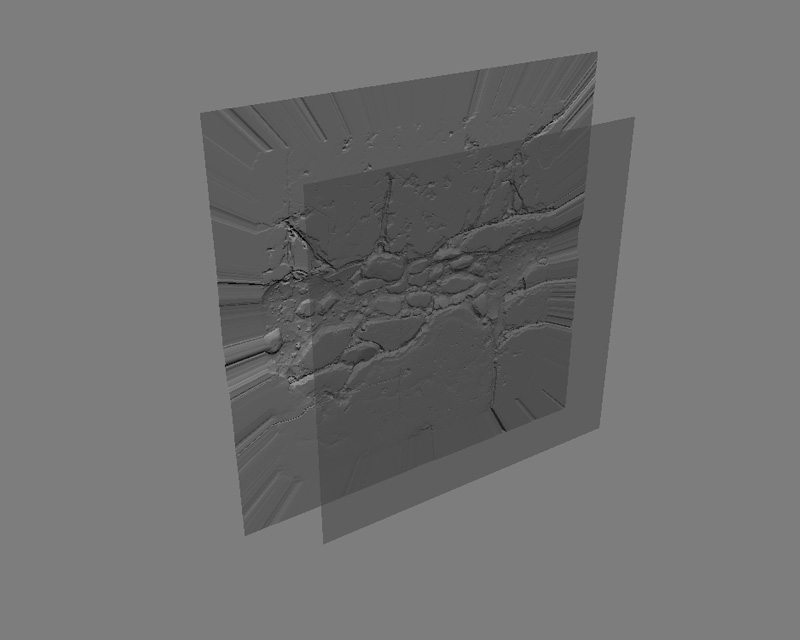
Here is how it all turned out combined.
Download the .PSD

< Back to Material Tutorials Index page